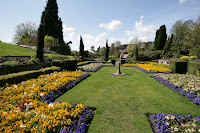
 This is the image that I used to change the filters. There are a lot of different colours in the image itself so I took this into consideration when I decided what filters to use.
Main image


The first filter i used was the "cutout" filter. This made the colours from the image stand out, you can see from the print scree that I changed the number of levels and the edge simplicity.

This was the next image that I added a filter to, i used to "liquify" tool under the filters to distort the photo. This has quite a dramatic effect on the picture. The liquifying is done manuly so you can choose what sections of the photo you want to filter out.

 For this image i used the "stained glass" filter option. you can see from the other image that I had to change the "cell size", this ment the size that each part of the "stained glass" effect. I also had to change the light intensity of the picture, this is used in the amount of light that was in the main part of the image.
for this image i used a different image. The image I used was quite grainy to start off with and i tried to sort the levels and saturation out before I filterend the image
No comments:
Post a Comment